
 Deutsche

Things to look for...
 Frame straightening will not detect damage to the bottom yoke.
 A good indicator of twist can be observed at the front wheel spindle. Spindle ends are usually parallel with the fork and not sunk as the picture illustrates.
 Vernier calipers prove the fork stanchions are parallel from top to bottom.
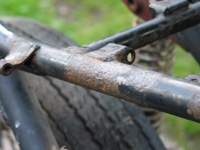 Most Z frames are at least forty years old. All of them have corrosion sores. Body filler is a common repair. Experience with a file and sand paper is preferred by old school craftsmen. They will not put a flat on the tube.
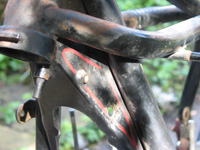
 This top rail has been repaired with a file. Holes in the headstock gusset require like for like metal repair, body filler is not acceptable. Braze, silver solder and letting in works well.
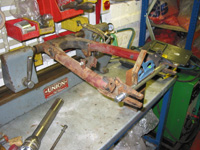
Frame Repair and Alignment
Put simply, as if it isn’t simple enough a frame alignment jig will show the relationship between the horizontal axis of the swing arm spindle and the angle of the headstock.
The test also confirms if the frame has been subjected to a left or right side swipe when the headstock angle is correct. Swing arm problems can be overlooked.
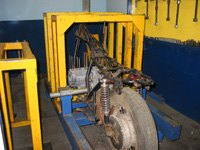
Frame jigs look like this...
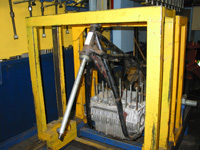
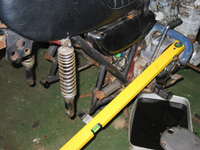
Lower repair cost will be achieved when you deliver the motorcycle to the engineer like this...
Deliver a complete motorcycle and expect to pay the cost of part removal.
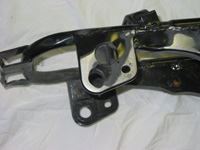
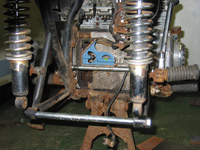
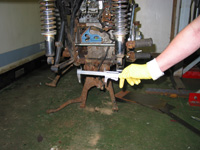
The swing arm can be checked for twist
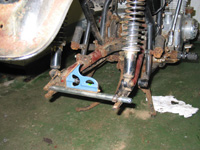
Centre stand down, wheel spindle in position. Place a simple bubble on the spindle, it will not be level. Place a spacer beneath one leg of the centre stand as shown. Ensure the bubble is central between the gradation marks.
Do not move the bike. Remove swing arm and insert the spindle. Place level on the swing arm spindle. If the bubble is in a similar position then the arm is not twisted.
If you own a set of bench centre’s then the arm can be tested in a similar way.
In these circumstances the bubble will be in a similar position on the swing arm spindle and bench centre trammel bed.
Product knowledge goes a long way. Paying for errors and omissions goes even further.
For example, a frame passed every test. Frame painted, engine installed and up on its feet, passenger footrests were fitted. Later on the exhaust pipes were offered up and fouled the rear footrest.
During a previous life the owner had done a first class job of lowering the footrest mounts
to accommodate a long legged passenger. A typical distance for the footrest lug is 135mm
assuming the jaw faces of the vernier caliper is outermost on the lug and exhaust mount.
The same measurement reduces to 119mm measured centre to centre.
If you own a set of old exhaust pipes install them. The acceptable distance from the outside face of the chain adjuster to the inside face of the exhaust pipe is 33.50mm Gear change side, the figure reduces to 30mm. Alternatively, a builders level and G clamp will give a dimension of 39.00mm
Left or right hand down accidents pushes the exhaust-mounting bracket inwards.
If your offset figure of 39.00mm using the G clamp method is correct then the distance between the two mounting points shall be not less than 250.00mm